February is a month of Love. True Love comes only once in a lifetime. So, never let it go until you draw your last breath. Never underestimate the power of Love. Only Love has the power to heal the broken heart. Love is everywhere, but it touches only fewer soul. When love is true, it knows no boundaries, it has no limitations. It cannot be measured. Distance is nothing when the love is real, if someone means so much, time and distance never separate them.

Today, it is a Valentine's day. Let's choose your valentine and show him/her that how much you love......
But before ending this day, I have some special recipe for all of you. I cannot hold enough anymore and finally, the wait is over. The recipe name is No-Bake Strawberry Jelly Biscuit Cake With Fresh Cream and Chocolate Syrup. Biscuit Cake is very popular in Europe and called European dessert and also called Refrigerator Cake. Here, in this recipe I give a twist to this recipe by adding Jelly and fresh cream along with some fresh strawberries.
Fruit is my first love and when talk about the cake I can die for it....this recipe is solely made for me and I can't wait anymore to have this on my plate.
Enjoy this delicious, healthy, tempting and fabulous recipe and don't forget to share this cake with your loved ones. Let's make a wish that my love for Fruit, Cream and Cake will remain forever till my last breath.
Happy Valentine's Day.  Prep Time: 30 mins
Cook Time: 30 mins
Total Time: 1 hr
Servings: 6-8
Cuisine: European
Course: Dessert
Author: Ayesha Md
Ingredients:
For Jelly:
Cook Time: 30 mins
Total Time: 1 hr
Servings: 6-8
Cuisine: European
Course: Dessert
Author: Ayesha Md
Ingredients:
For Jelly:
500 ml (2 cups) of water
Weikfield Jelly, Strawberry Flavour
For Biscuit Cake:
120 gm biscuit (Marie gold biscuit or any tea biscuit)
2 tbsp of butter
4 tbsp of Weikfield cocoa powder
5 tbsp sugar
1/2 tsp vanilla essence
150 ml (1 cup of milk)
8 almonds, finely chopped
8 cashew nuts, finely chopped
For Syrup:
1/2 fresh cream
1/2 cup milk
4 tbsp of Weikfield cocoa powder
1/2 tsp vanilla essence
3-4 tbsp of sugar
fresh strawberries for decorate
Method:
1) Mix the contents of the Weikfield Strawberry Jelly Crystals pack and Premix sachet in a bowl. As shown in the picture.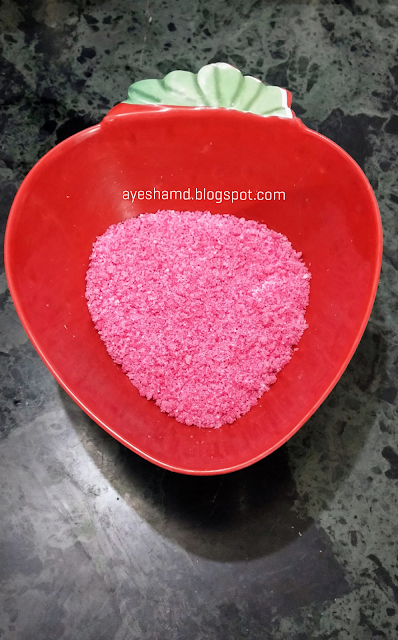
 2) Ignore if there are any lumps in the mix, as these will easily dissolve when hot water is added. As shown in the picture.
 3) Boil 500 ml of water in a vessel. Allow it to cool for 1 min. As shown in the picture.
  4) Pour the hot water into the bowl containing the Weikfield Strawberry Jelly Crystals and Premix. Stir until completely dissolved. As shown in the picture.
  5) The Jelly set at room temperature in 45 minutes. Refrigerate it over night. As shown in the picture.
 6) Take a bowl, add any tea biscuit here, I'm using Marie gold biscuit. As shown in the picture.
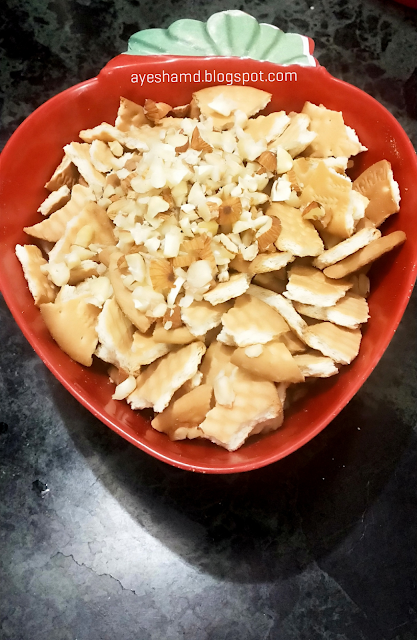
 7) Break down all the pieces into 1/2 inches approximately. Add chopped nuts. As shown in the picture.
 8) Take a large vessel, add butter, milk, cocoa powder, vanilla essence and sugar make a smooth mixture free of lumps. As shown in the picture.


 9) Turn on the flame and cook this mixture for about 5-10 minutes or till the syrup is slightly thick. As shown in the picture.
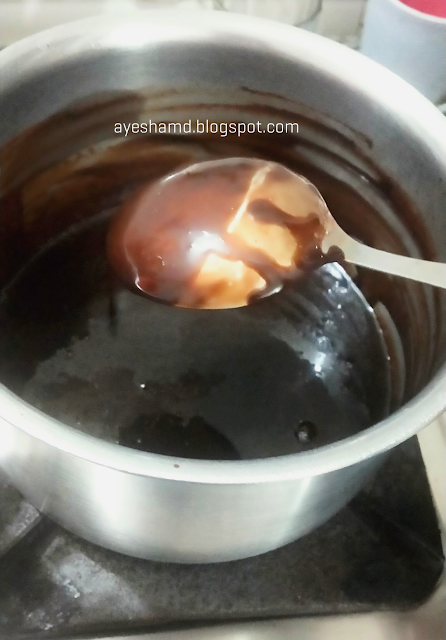
 10) To test, the syrup must coat back of the spoon this is the right consistency. The syrup will thicken after cooling. As shown in the picture.
 11) After cooling, pour this syrup into the biscuit and mix well. As shown in the picture.


 12) Now take out the jelly of a refrigerator, which had been made previously. As shown in the picture.
 13) Transfer the chocolate biscuits mixture on jelly and press down with the base of a jelly and smoothen at the top with the help of spatula. As shown in the picture.
 14) Cover it and refrigerate it for 5-6 hours or overnight. 15) Take another vessel, add fresh cream, cocoa powder, vanilla essence and sugar make a smooth mixture free of lumps. As shown in the picture.
 16) Turn on the flame and cook this mixture for about 5-10 minutes or till the syrup is slightly thick. 17) To test, the syrup must coat back of the spoon this is the right consistency. The syrup will thicken after cooling. As shown in the picture.
 18) After cooling, pour this chocolate syrup on the biscuit and jelly cake. Refrigerate jelly and biscuit cake for 3-4 hours or until set. As shown in the picture.
 19) Remove the jelly biscuit cake with the help of a plate. Decorate it with fresh cream and strawberries. As shown in the picture.


 20) Yours delicious No-Bake Jelly Biscuit Cake With Fresh Cream and Chocolate Syrup is ready to serve. Serve chilled. As shown in the picture.
If you have any queries regarding this recipe don't forget to share your comment, your comments are valuable for me. It would always be a pleasure for me to serve you....And I'll be back soon with an another exciting recipe....
Weikfield Jelly, Strawberry Flavour
For Biscuit Cake:
120 gm biscuit (Marie gold biscuit or any tea biscuit)
2 tbsp of butter
4 tbsp of Weikfield cocoa powder
5 tbsp sugar
1/2 tsp vanilla essence
150 ml (1 cup of milk)
8 almonds, finely chopped
8 cashew nuts, finely choppedFor Syrup:
1/2 fresh cream
1/2 cup milk
4 tbsp of Weikfield cocoa powder
1/2 tsp vanilla essence
3-4 tbsp of sugar
fresh strawberries for decorate
Method:
1) Mix the contents of the Weikfield Strawberry Jelly Crystals pack and Premix sachet in a bowl. As shown in the picture.
2) Ignore if there are any lumps in the mix, as these will easily dissolve when hot water is added. As shown in the picture.3) Boil 500 ml of water in a vessel. Allow it to cool for 1 min. As shown in the picture. 4) Pour the hot water into the bowl containing the Weikfield Strawberry Jelly Crystals and Premix. Stir until completely dissolved. As shown in the picture. 5) The Jelly set at room temperature in 45 minutes. Refrigerate it over night. As shown in the picture.6) Take a bowl, add any tea biscuit here, I'm using Marie gold biscuit. As shown in the picture.7) Break down all the pieces into 1/2 inches approximately. Add chopped nuts. As shown in the picture.
8) Take a large vessel, add butter, milk, cocoa powder, vanilla essence and sugar make a smooth mixture free of lumps. As shown in the picture.
9) Turn on the flame and cook this mixture for about 5-10 minutes or till the syrup is slightly thick. As shown in the picture.
10) To test, the syrup must coat back of the spoon this is the right consistency. The syrup will thicken after cooling. As shown in the picture.11) After cooling, pour this syrup into the biscuit and mix well. As shown in the picture.
12) Now take out the jelly of a refrigerator, which had been made previously. As shown in the picture.13) Transfer the chocolate biscuits mixture on jelly and press down with the base of a jelly and smoothen at the top with the help of spatula. As shown in the picture.
14) Cover it and refrigerate it for 5-6 hours or overnight. 15) Take another vessel, add fresh cream, cocoa powder, vanilla essence and sugar make a smooth mixture free of lumps. As shown in the picture.
16) Turn on the flame and cook this mixture for about 5-10 minutes or till the syrup is slightly thick. 17) To test, the syrup must coat back of the spoon this is the right consistency. The syrup will thicken after cooling. As shown in the picture.18) After cooling, pour this chocolate syrup on the biscuit and jelly cake. Refrigerate jelly and biscuit cake for 3-4 hours or until set. As shown in the picture.
19) Remove the jelly biscuit cake with the help of a plate. Decorate it with fresh cream and strawberries. As shown in the picture.
20) Yours delicious No-Bake Jelly Biscuit Cake With Fresh Cream and Chocolate Syrup is ready to serve. Serve chilled. As shown in the picture.
If you have any queries regarding this recipe don't forget to share your comment, your comments are valuable for me. It would always be a pleasure for me to serve you....And I'll be back soon with an another exciting recipe....
2 tbsp of butter
4 tbsp of Weikfield cocoa powder
5 tbsp sugar
1/2 tsp vanilla essence
150 ml (1 cup of milk)
8 almonds, finely chopped
8 cashew nuts, finely chopped
For Syrup:
1/2 fresh cream
1/2 cup milk
4 tbsp of Weikfield cocoa powder
1/2 tsp vanilla essence
3-4 tbsp of sugar
fresh strawberries for decorate
Method:
1) Mix the contents of the Weikfield Strawberry Jelly Crystals pack and Premix sachet in a bowl. As shown in the picture.
2) Ignore if there are any lumps in the mix, as these will easily dissolve when hot water is added. As shown in the picture.3) Boil 500 ml of water in a vessel. Allow it to cool for 1 min. As shown in the picture. 4) Pour the hot water into the bowl containing the Weikfield Strawberry Jelly Crystals and Premix. Stir until completely dissolved. As shown in the picture. 5) The Jelly set at room temperature in 45 minutes. Refrigerate it over night. As shown in the picture.6) Take a bowl, add any tea biscuit here, I'm using Marie gold biscuit. As shown in the picture.7) Break down all the pieces into 1/2 inches approximately. Add chopped nuts. As shown in the picture.
8) Take a large vessel, add butter, milk, cocoa powder, vanilla essence and sugar make a smooth mixture free of lumps. As shown in the picture.
9) Turn on the flame and cook this mixture for about 5-10 minutes or till the syrup is slightly thick. As shown in the picture.
10) To test, the syrup must coat back of the spoon this is the right consistency. The syrup will thicken after cooling. As shown in the picture.11) After cooling, pour this syrup into the biscuit and mix well. As shown in the picture.
12) Now take out the jelly of a refrigerator, which had been made previously. As shown in the picture.13) Transfer the chocolate biscuits mixture on jelly and press down with the base of a jelly and smoothen at the top with the help of spatula. As shown in the picture.
14) Cover it and refrigerate it for 5-6 hours or overnight. 15) Take another vessel, add fresh cream, cocoa powder, vanilla essence and sugar make a smooth mixture free of lumps. As shown in the picture.
16) Turn on the flame and cook this mixture for about 5-10 minutes or till the syrup is slightly thick. 17) To test, the syrup must coat back of the spoon this is the right consistency. The syrup will thicken after cooling. As shown in the picture.18) After cooling, pour this chocolate syrup on the biscuit and jelly cake. Refrigerate jelly and biscuit cake for 3-4 hours or until set. As shown in the picture.
19) Remove the jelly biscuit cake with the help of a plate. Decorate it with fresh cream and strawberries. As shown in the picture.
20) Yours delicious No-Bake Jelly Biscuit Cake With Fresh Cream and Chocolate Syrup is ready to serve. Serve chilled. As shown in the picture.
If you have any queries regarding this recipe don't forget to share your comment, your comments are valuable for me. It would always be a pleasure for me to serve you....And I'll be back soon with an another exciting recipe....
1/2 cup milk
4 tbsp of Weikfield cocoa powder
1/2 tsp vanilla essence
3-4 tbsp of sugar
fresh strawberries for decorate
Method:
1) Mix the contents of the Weikfield Strawberry Jelly Crystals pack and Premix sachet in a bowl. As shown in the picture.
2) Ignore if there are any lumps in the mix, as these will easily dissolve when hot water is added. As shown in the picture.3) Boil 500 ml of water in a vessel. Allow it to cool for 1 min. As shown in the picture. 4) Pour the hot water into the bowl containing the Weikfield Strawberry Jelly Crystals and Premix. Stir until completely dissolved. As shown in the picture. 5) The Jelly set at room temperature in 45 minutes. Refrigerate it over night. As shown in the picture.6) Take a bowl, add any tea biscuit here, I'm using Marie gold biscuit. As shown in the picture.7) Break down all the pieces into 1/2 inches approximately. Add chopped nuts. As shown in the picture.
8) Take a large vessel, add butter, milk, cocoa powder, vanilla essence and sugar make a smooth mixture free of lumps. As shown in the picture.
9) Turn on the flame and cook this mixture for about 5-10 minutes or till the syrup is slightly thick. As shown in the picture.
10) To test, the syrup must coat back of the spoon this is the right consistency. The syrup will thicken after cooling. As shown in the picture.11) After cooling, pour this syrup into the biscuit and mix well. As shown in the picture.
12) Now take out the jelly of a refrigerator, which had been made previously. As shown in the picture.13) Transfer the chocolate biscuits mixture on jelly and press down with the base of a jelly and smoothen at the top with the help of spatula. As shown in the picture.
14) Cover it and refrigerate it for 5-6 hours or overnight. 15) Take another vessel, add fresh cream, cocoa powder, vanilla essence and sugar make a smooth mixture free of lumps. As shown in the picture.
16) Turn on the flame and cook this mixture for about 5-10 minutes or till the syrup is slightly thick. 17) To test, the syrup must coat back of the spoon this is the right consistency. The syrup will thicken after cooling. As shown in the picture.18) After cooling, pour this chocolate syrup on the biscuit and jelly cake. Refrigerate jelly and biscuit cake for 3-4 hours or until set. As shown in the picture.
19) Remove the jelly biscuit cake with the help of a plate. Decorate it with fresh cream and strawberries. As shown in the picture.
20) Yours delicious No-Bake Jelly Biscuit Cake With Fresh Cream and Chocolate Syrup is ready to serve. Serve chilled. As shown in the picture.
If you have any queries regarding this recipe don't forget to share your comment, your comments are valuable for me. It would always be a pleasure for me to serve you....And I'll be back soon with an another exciting recipe....
If you have any queries regarding this recipe don't forget to share your comment, your comments are valuable for me. It would always be a pleasure for me to serve you....And I'll be back soon with an another exciting recipe....