Sunday, August 23, 2020

Khubz Arabi (الخبز العربي)/Pita Bread....Without Oven

Khubz Arabi (الخبز العربي)/Pita Bread is common in the Middle East and its neighboring areas. Khubz, also known as Lebanese bread, or Syrian bread. In Egyptian Arabic, it is called ʿaish (عيش) or ʿaish baladi (عيش بلدي).'Aish means life in Arabic, highlighting the importance of pita bread in Egyptian culture. It is one of the staple food items in the Lebanese cuisine. Khubz Arabi (الخبز العربي)/Pita Bread bake at high temperature (450–475 °F) (232–246 °C), which turns the water in the dough into steam, thus causing the pita to puff up and form a pocket. When removed from the oven, the layers of baked dough remain separated inside the deflated pita, which allows the bread to be opened to form a pocket. However, pita is sometimes baked without pockets and is called "pocket-less pita". Once the Khubz Arabi (الخبز العربي)/Pita Bread is baked and cooled, it flattens out but maintains the internal pockets. Khubz Arabi (الخبز العربي)/Pita Bread is perfect for stuffing. Khubz Arabi (الخبز العربي)/Pita Bread can cut it in half and each half has its own pocket, which can be used for stuffing, common fillings include falafel, lamb or chicken Shawarma, kebab, omelettes such as shakshouka (eggs and tomatoes), hummus, and other mezes. Some source may be taken from https://en.wikipedia.org/wiki/Khubz. The main ingredients of Khubz Arabi (الخبز العربي)/Pita Bread are All purpose flour, yeast, sugar, salt and water. However, Khubz Arabi (الخبز العربي)/Pita Bread are baked in the oven, but in this recipe, I'm going to show you how to cook this delicious Khubz Arabi (الخبز العربي)/Pita Bread without  an oven. So, what are you waiting for go ahead and try this recipe.


Prep Time: 30 mins
Cook Time: 1 hr
Cuisine: Middle East
Serves:  3-4
Course: Lunch or Dinner
Author: Ayesha Md


Ingredients:


4 cups of all purpose flour
1/2 tbsp salt (as per taste)
2 tsp of active dry yeast powder
2 cups of lukewarm water
1 tsp baking powder, double action
2 tsp of sugar
2 tbsp of olive oil + 1 tbsp for greasing


Methods of cooking:

1) Take an empty bowl, then add flour, salt, baking powder and olive oil.

2) Take an another bowl, dissolve sugar and yeast in lukewarm water. Let it settle for 10 minutes.

3) Now mix this mixture and knead it for 5-10 minutes or till it becomes a soft dough. Cover it with cling drape and let it rise 6-8 hours. As shown in the picture.


4) Now your dough has risen, knead for a few minutes. Divide it into 7-8 medium size balls. As shown in the picture. 


5) With the help of rolling pin, flatten each ball like a Chapati to a get round shape. 

6) Heat a non-stick pan on medium flame, now place the Khubz Arabi (الخبز العربي)/Pita Bread on the pan and wait for a few minutes or until it starts bubbling on top, then flip over. Again, wait for another few seconds. As shown in the picture. Now, press it using a spoon or spatula so that it puffs up. Turn it and press it and take it out. 


7) Alternatively, Khubz Arabi (الخبز العربي)/Pita Bread could also cook like an Indian Chapati, place the Khubz Arabi (الخبز العربي)/Pita Bread on the preheated pan and wait for a few minutes or until it starts bubbling on top, then flip over. Again, wait for another few seconds. As shown in the picture. Then place them on the fire and cook on both the sides. You see how it puffs up. As shown in the picture.


8) Repeat this process for the rest of the dough.

9) Yours delicious Khubz Arabi (الخبز العربي)/Pita Bread is ready. Serve it hot with Hummus, Chicken roast and any types of gravy. As shown in the picture. 


10) Khubz Arabi (الخبز العربي)/Pita Bread is perfect for stuffing.
Khubz Arabi (الخبز العربي)/Pita Bread can cut it in half and each half has its own pocket, which can be used for stuffing with Falafel, Kabab or Chicken/Meat along with some onion rings, tomato slices, cucumber slices and sauce.


Notes:

1) Water should not be too hot or too cool, the water has to be lukewarm. 

2) For the activation and proofing always use lukewarm water.

3) In this recipe, I use active dry yeast powder. F
or the activation and proofing mix with lukewarm water along with some sugar, let it settle for 10 minutes. Discard it, if activation fails at this stage. 

4) Khubz Arabi (الخبز العربي)/Pita Bread, can be baked in an oven or tawa.

5) Instead of using all purpose flour you can also use wheat flour. 

If you have any queries regarding this recipe don't forget to share your comment, your comments are valuable for me. It would always be a pleasure for me to serve you....And I'll be back soon with an another exciting recipe....

Friday, June 12, 2020

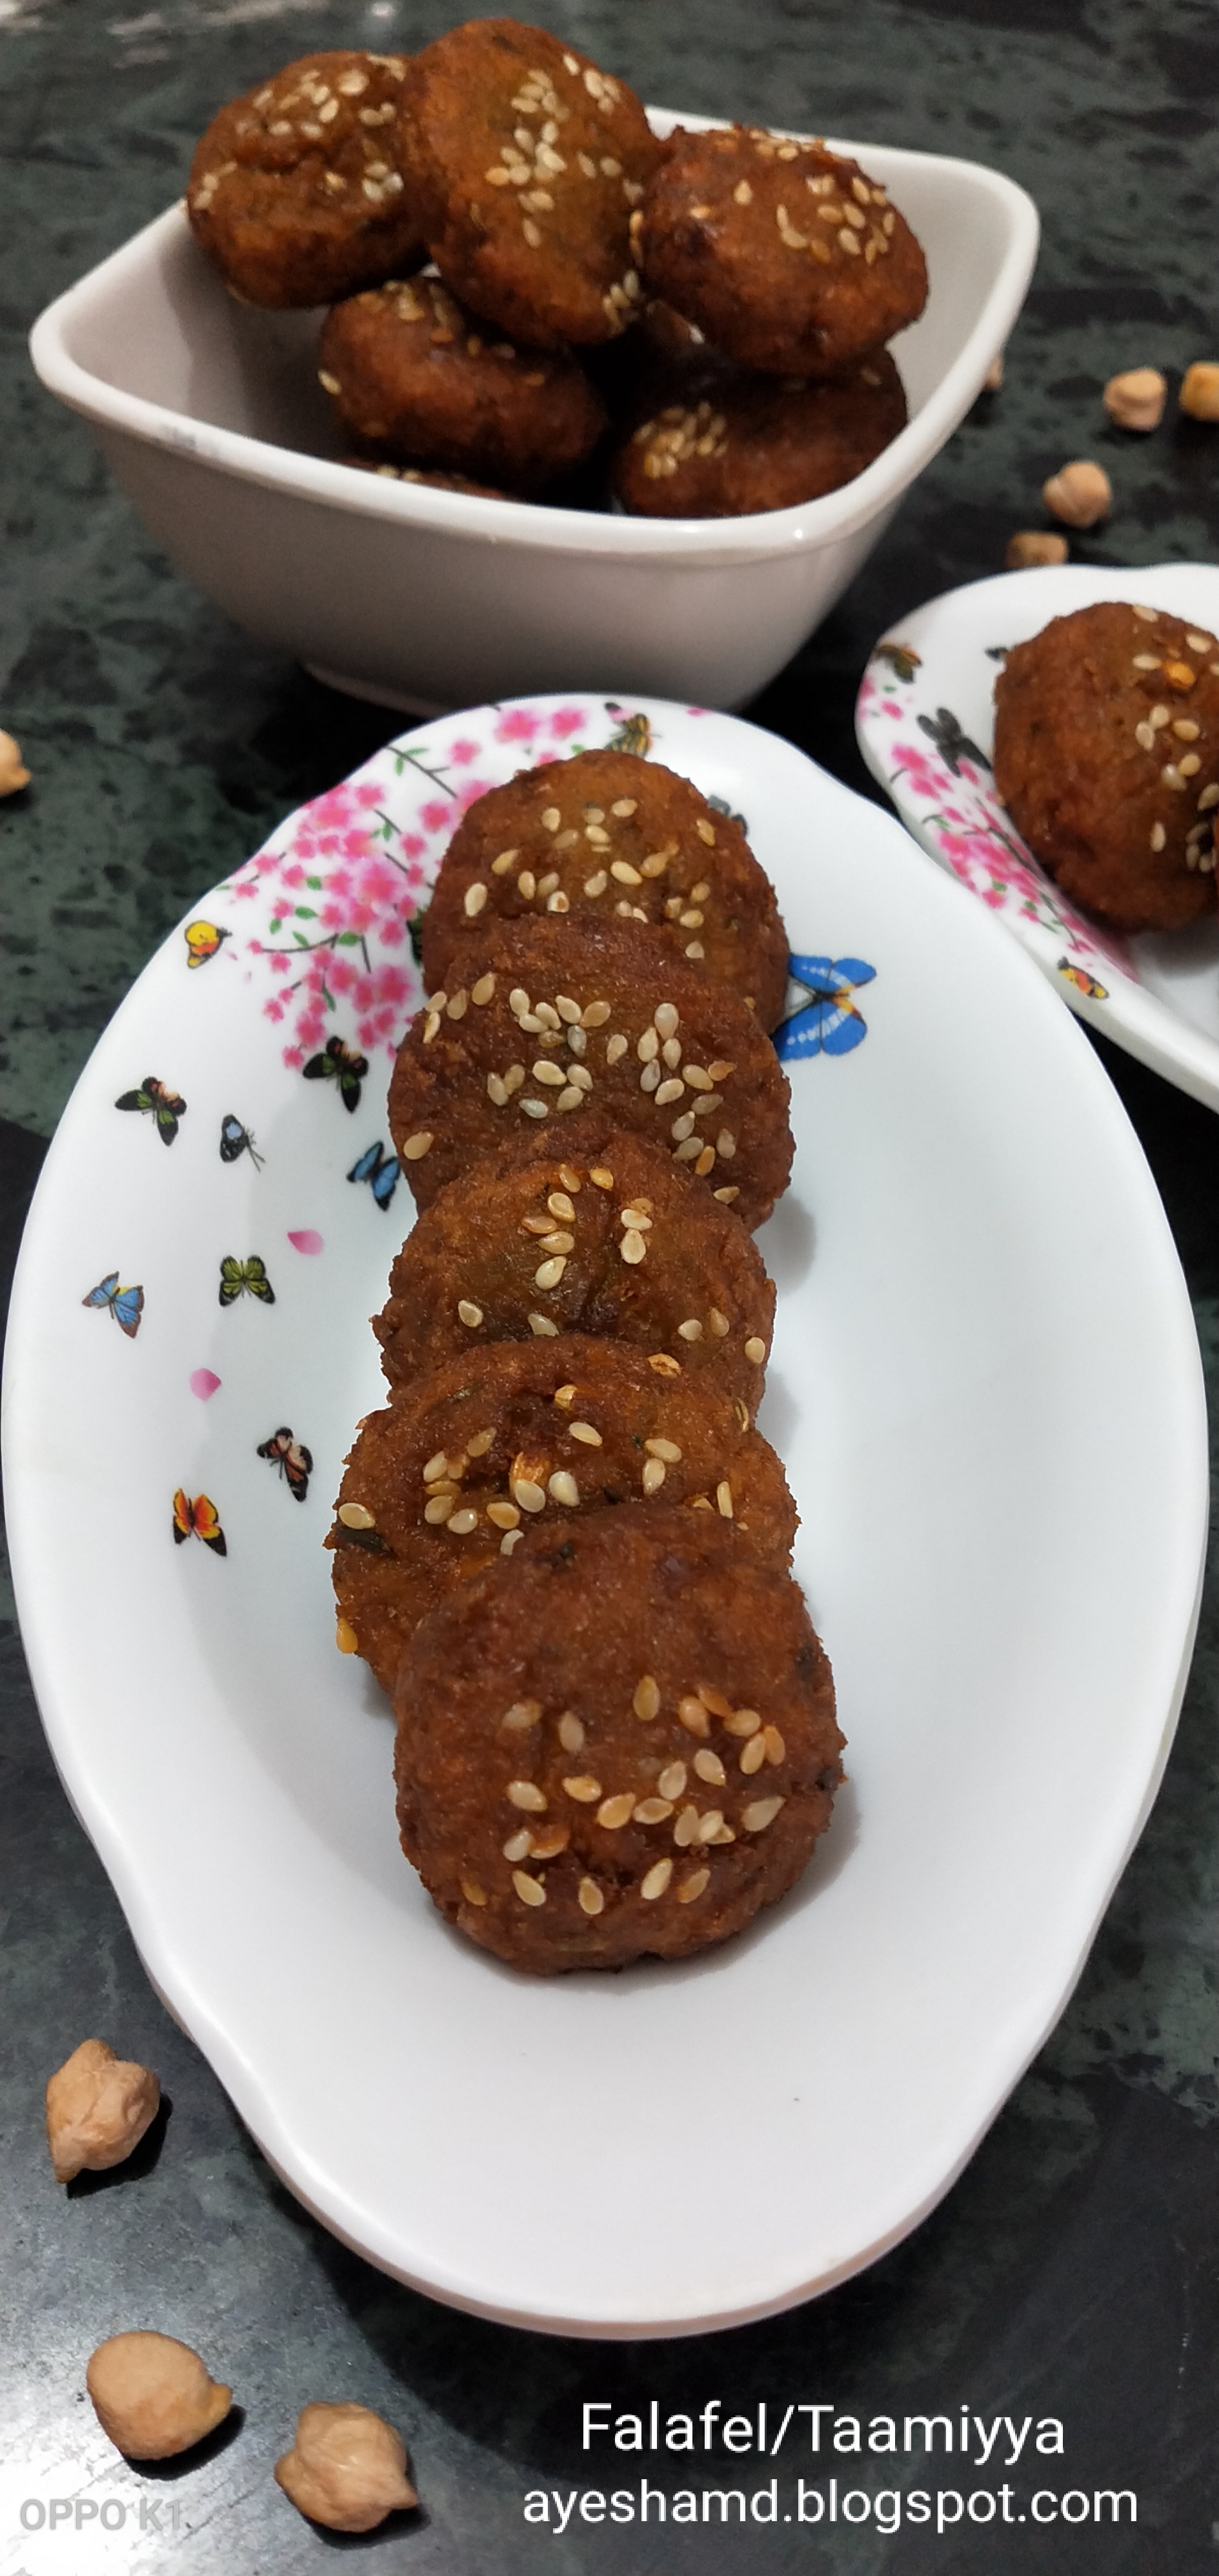
Egyptian Falafel فلافل / Taamiyya طعمية‎

Falafel is also known as Taamiyya. Falafel/Taamiyya is originated in Egypt. The word Falafel/Taamiyya can refer to the fritters themselves or to sandwiches filled with them. Falafel/Taamiyya is a well known Middle Eastern dish and these fritters are now found around the world as a form of street food or fast food and as part of vegetarian cuisine. Falafel/Taamiyya is a deep-fried ball, that are crispy on the outside and soft inside. The main ingredients of Falafel/Taamiyya are Chickpeas/Fava beans or a mixture of both, onion, garlic, a bunch of cilantro/parsley leaves, all purpose flour, baking powder and some spices that's blended together and then fried or baked. Falafel/Taamiyya balls may also be eaten as a snack or as part of an appetizers known as a Meze. During Ramadan, Falafel/Taamiyya balls are sometimes eaten as part of the Iftar. 


Falafel/Taamiyya when made with chickpeas, contain no cholesterol and is high in protein, complex carbohydrates, soluble fiber, which has been shown to be effective in lowering blood cholesterol, calcium, iron, magnesium, phosphorus, potassium, zinc, copper, manganese, vitamin C, vitamin B and folate. Falafel/Taamiyya can be baked to reduce the amount of fat absorbed during the frying process.


I was born and raised in Makkah, Saudi Arabia. I've had them in restaurant and on street corners. I've had them stuffed in pita bread or french bread along with salad, french fries, fried eggplant, boiled eggs and hot sauce or a tahini sauce. For me, Falafel/Taamiyya is not only fritter, I love Falafel/Taamiyya, I miss the flavor of Falafel/Taamiyya almost everyday in my life. That's the reason, which in turn led me to make this delicious recipe. So, what are you waiting for, go ahead and try this yummy and delicious recipe of Falafel/Taamiyya. I assure you, that you, your family and your children would love to eat. 


Prep Time: 30 mins
Cook Time: 30 mins
Total Time: 1 hr
Serves: 2-3
Course: Snack 
Cuisine: Egyptian
Author: Ayesha Md


Ingredients:

200 gm chickpeas
2 tbsp all purpose flour
1/2 tsp baking powder
salt as per taste
2-3 green chilies remove the stem
6-8 garlic cloves, roughly chopped
1 medium size onion, roughly slice
a bunch of cilantro/parsley leaves
2 tbsp coriander seeds
2 tbsp fennel seeds
2-4 tbsp sesame seeds for coating
oil for frying


Methods of cooking:

1) Wash, add salt, water and 1 tsp baking powder, let chickpeas soak for overnight or at least 8-10 hours. As shown in the picture. 


Add caption


2) Now, your chickpeas are soaked. As shown in the picture. 


3) Take a food processor, add the chickpeas, salt, onion, garlic, cilantro/parsley leaves and green chilies to a food processor, now pulse the food processor to make  a coarse sand. Do not blend completely. As shown in the picture.


4) Transfer the mixture to a bowl, then add all purpose flour, fennel seeds, coriander seeds and baking powder, mix them well and cover with a lid. As shown in the picture.


5) Place the bowl of Falafel/Taamiyya mixture in the fridge. Let it chill the Falafel/Taamiyya mixture for about 1-2 hours.

6) Take a large Kadhai/pan/pot, heat enough oil, shape the Falafel/Taamiyya mixture into small balls by hand or with the help of cookie scoop or Falafel/Taamiyya scoop. Choose your own shape, if you'd like round balls or flatter patty shapes. Any shape can be used for deep frying. 

7) Now, in hot oil, drop 4-8 Falafel/Taamiyya balls or depending on the size of your kadhai/pan/pot. Let them cook for about 3-4 minutes, also stir occasionally or fry the Falafel/Taamiyya balls until golden brown, transfer them to a kitchen paper. 


8) Repeat this process for the rest of the Falafel/Taamiyya mixture.

9) Yours delicious Egyptian Falafel/Taamiyya is ready, serve Falafel/Taamiyya hot with hummus or Tahini sauce. As shown in the picture.


Note:


1) Do not use canned chickpeas for making Falafel/Taamiyya. Canned chickpeas have already been cooked and will be too soft and wet.
2) Use only dried and soaked chickpeas for making Falafel/Taamiyya.
3) Chickpea flour can also be used instead of all purpose flour.
4) Oil should not be too hot, otherwise the outside will cook too fast before the inside. 
5) Make sure the Falafel/Taamiyya balls should not break apart while frying.


If you have any queries regarding this recipe don't forget to share your comment, your comments are valuable for me. It would always be a pleasure for me to serve you....And I'll be back soon with an another exciting recipe....

Tuesday, May 26, 2020

Sheer Khurma शीर ख़ुर्मा....Eid Special Recipe


When the Moon of Eid arises, it brings happiness and excitement with itself. May your life always stay filled with such amusing excitement and happiness. Eid is the time of year when you should amend your mistakes and forgive others mistakes. No matter where you are or what you are doing, remember that Allah is always with you to help and guide you in every important step of your life. Eid Mubarak!
Sheer khurma or sheer khorma is a festival vermicelli pudding prepared by Muslims on Eid ul-Fitr and Eid al-Adha in Afghanistan, Indian subcontinent and parts of Central Asia. It is a traditional Muslim festive breakfast, and a dessert for celebrations. This special dish is served on the morning of Eid day in the family after the Eid prayer as breakfast, and throughout the day to all the visiting guests. It is very popular throughout the Indian subcontinent and Central Asia. The main ingredients used in Sheer khurma are vermicelli, whole milk, sugar and dates. Depending on the region, cardamom, pistachios, almonds, cloves, saffron, raisins, and rose water are also added. Vermicelli is fried in clarified butter. Then milk (sheer) is added and the vermicelli are allowed to cook further. As the mixture thickens, sugar and dates (khajoor) are added along with any other dried fruits. Source taken from https://en.wikipedia.org/wiki/Sheer_khurma

Sheer means "Milk" in Persian and Khurma means "Dates". Today I'm going to show you how to make a delicious Sheer Khurma.


Prep Time: 10 mins
Cook Time: 20 mins
Total Time: 30 mins
Servings: 4-6

Cuisine: Hyderabad

Course: Dessert
Author: Ayesha Md


Ingredients:

1 litre or 5 cups whole milk
50 grams vermicelli (broken into small pieces), roasted
2 tbsp ghee/clarified butter
1/2 cup sugar or (as per taste)
8-10 almonds, sliced
8-10 pistachios, sliced
6-8 cashew nuts, chopped
8-10 dates seedless, chopped lengthwise
1 tbsp chironji (charoli)
10-12 raisins
5 green cardamoms powder
1 tsp rose/kewra water


Instructions:

1) Take a pan, heat a tbsp of ghee and add 50 grams of fine seviyan/vermicelli. Roast on low flame till they turn aromatic and golden brown. Keep aside.


2) In the same pan. Heat a tbsp of ghee. Add chopped dry fruits (chironji, pistachios, almonds, cashews, raisins and dates) and saute for 4-5 minutes.

3) Take a large heavy saucepan, now add 5 cups of milk and let the milk come to boil. Lower the flame and simmer for about 5-10 minutes till the milk slightly thickens. Stir occasionally, to prevent milk from burning.


4) Add the roasted seviyan/vermicelli and sugar to the milk and mix them well. Simmer for 8-10 minutes, reducing the quantity or till the seviyan/vermicelli are cooked and softened. 


5) Now, add cardamom powder, roasted nuts and rose/kewra water and mix well. Cook for another 1-2 minutes. Turn off the flame.

6) Now, pour Sheer Khurma into a serving bowl and garnish it with more dry fruits. As shown in the picture.


7) Yours delicious and yummy Sheer Khurma is ready. Serve hot or cold. As shown in the picture.


If you have any queries regarding this recipe don't forget to share your comment, your comments are valuable for me. It would always be a pleasure for me to serve you....And I'll be back soon with an another exciting recipe....

Saturday, May 16, 2020

Sweet Curd Rice With Mango....Ramadan Special Recipe

That time of the year has come. A month to repent of our wrongdoing and sin. May all of us find peace on this Ramadan. May this Ramadan bring the blessings for the entire humanity that we can walk in the way of peace and harmony!

During Ramadan, we are always in search of some Chatpata as well as healthy dish. When we are taking Suhoor or Sehri (the pre-dawn meal) we should always keep a wholesome meal that provides long-lasting energy throughout the day. Foods that are rich in fiber and are also digested slowly such as vegetables and fruits. Complex carbohydrates are found in foods such as peas, beans, rice, whole wheat and oats, that are rich in energy but release this energy slowly throughout the day. Foods to avoid during Iftar (the post-dusk meal) such as fried pakora, fried spring rolls, oily curries, fried fish, fried chicken, fried chips, fried samosas, Gulab jamun, jalebi and greasy pastries. Avoid foods high in fat, salt and sugar. Instead of making your Ramadan recipes healthier by grilling or steaming, roasting, stewing, baking and whenever possible, avoid frying.

Today, I'm going to show you how to make Sweet Curd Rice With Mango, the main ingredients of this recipe are curd, rice, fruit, dry fruit and some sugar. Curd has many essential benefits, like other dairy products, curd contains calcium and strengthening your bones and teeth. It can help you lose weight, boost immunity, improve your skin and improve your digestion. It is a great substitute for milk. It is a great substitute for people who find it hard to digest milk. So, let's move to the recipe of the day Sweet Curd Rice With Mango, this is one of the healthiest and delicious recipe. If you love curd, fruit and dry fruit, then this recipe Sweet Curd Rice With Mango is for you. So, at least try this recipe once and I'm sure you, your family and your children would love to eat.


Prep Time: 5 mins

Cook Time: 25 mins

Total Time: 30 mins

Servings: 2-3

Course: Side Dish
Cuisine: South Indian Recipe


Author: Ayesha Md

Ingredients:

1 cup cooked rice
1-1.5 cup thick curd (Yogurt)
2 tbsp sugar, more or less (as per taste)
6-8 almonds
6-8 cashew nuts
8-10 raisins
4-6 walnuts
8-10 peanuts
1 cup Mango (peeled and chopped)


Method:


1) Take a large bowl, whisk curd nicely using hand beater.

2) Add cooked rice to the whisked curd, mix well, then add sugar and all the nuts, mix them well.

3) Refrigerate
Sweet Curd Rice for 2 hours.

4) Now, pour
Sweet Curd Rice into the serving bowl and garnish with chopped mango. As shown in the picture.


5) Yours
Sweet Curd Rice With Mango is ready. Serve chilled. As shown in the picture.


Note:


1) You can garnish with your favorite fruit such as banana, apple, strawberry, kiwi and pomegranate seeds.

2) Mash the rice lightly with masher. If you do not like mushy rice, then skip this. 

If you have any queries regarding this recipe don't forget to share your comment, your comments are valuable for me. It would always be a pleasure for me to serve you....And I'll be back soon with an another exciting recipe....

Sunday, May 10, 2020

Veg Kathi Roll/ Veg Frankie...Ramadan Special Recipe

A Kathi Roll is a street-food dish originating from Kolkata, West Bengal. In its original form, it is a skewer-roasted kebab wrapped in a paratha bread, although over the years many variants have evolved all of which now go under the generic name of Kathi Roll. Today, mostly any wrap containing a filling enfolded in an Indian flatbread (roti) is called a Kathi Roll. In native Bengali, the word Kathi roughly translates to "Stick", referring to how they were originally made. In Bengal, though, the delicacy is simply known as "Roll". Kathi Rolls normally contain coriander chutney, egg, and chicken, but the types may vary. Internationally, specifically in parts of Canada and the United States, Kathi Roll has become popular fast food found in Indian take-out restaurants. The Kathi Roll is said to have started its life in the Nizam Restaurant in Kolkata, a popular eatery founded in 1932. Nizam enjoyed a virtual monopoly over this method of serving kababs for decades, but it eventually became commonplace in Kolkata and later spread elsewhere. Today, the Kathi Roll comes in a large number of varieties. Innovations tend to be in two areas—the fillings and the wrap. Common variants on the filling are egg, potato, paneer, mixed vegetables and curried chicken or mutton. More exotic versions may have different ingredient combinations, or fancy curries such as Thai or Sichuan. Source taken from https://en.wikipedia.org/wiki/Kati_roll

Veg Kathi Roll/Veg Frankie
is a delicious and healthy brunch, lunch and tiffin box snack. I'm sharing a simple 
Veg Kathi Roll/Veg Frankie. Hope you will give this a try.


Prep Time: 45 mins

Cook Time: 1 hr

Total Time: 1 hr 45 mins


Servings: 2-3


Course: Brunch, Lunch, or Tiffin Box


Cuisine: Bengali

Author: Ayesha Md 


Ingredients:

For Veggies And Stuffing:


250 gm cauliflower, finely chopped
2 carrots (Julienne cut)
2 capsicums, thinly slice
2 medium size onions, thinly slice (set aside 1 onion for stuffing)
4-6 garlic cloves, finely chopped
salt as per taste
2 tbsp tomato ketchup + for stuffing
1 tsp black pepper powder
1 tbsp red chilli powder (optional)
1-2 tbsp dark soy sauce (optional)
1 tbsp cooking oil
1 tbsp chat masala powder
Mayonnaise for stuffing (optional)
Green chilli sauce for stuffing
water if needed


For Dough:

250 gm All purpose flour (maida)
salt
 as per taste
2 tbsp cooking oil
water required for kneading dough


Methods of cooking:

1) Take a large bowl and add all purpose flour, salt and cooking oil and mix them well, then add water as required and knead to make a smooth soft dough. Cover the dough and keep aside for at least 30 minutes. 
As shown in the picture.


2) In the meanwhile, take a kadhai/pot vessel, heat oil, then add garlic and saute for a minute or till it's golden brown. Now, add cauliflower and salt mix them well, sprinkle some water if required, and cook for about 5 minutes. Then add carrots, chat masala, tomato ketchup, soy sauce and black pepper powder, mix well, and cook for another 5 minutes. Then add capsicum, cook for a minute and turn off the flame. As shown in the picture.


3) Now, your dough is ready, remove the dough from the bowl, sprinkle some flour on the rolling board and starts kneading the dough for a few minutes. Divide the dough into 6-7 equal sizes. And make a small ball. As shown in the picture. With the help of rolling pin, flatten the dough into a small size Chapati. 
As shown in the picture.


4) Heat the non-stick Tawa (pan) and place the Chapati on the tawa and cook for a few minutes or until it starts bubbling, then flip the Chapati on the other side and cook till it get brown spot. Apply ghee/oil on both the side and cook for 1-2 minutes on each side. Repeat this process for the rest of the Chapatis. 
As shown in the picture.


5) Now take a single Chapati. Place the veg stuffing in the center. Sprinkle some chat masala on top. You can add a tablespoon of tomato ketchup, Mayonnaise and green chili sauce. Top with onion or veg salad. 
As shown in the picture.


6) Roll both the sides of the Chapati or roll the Chapati vertically tightly ensuring that no stuffing fall out. Now wrap them in butter paper or aluminium foil from the base, so that while eating the stuffing does not fall down. 
As shown in the picture.


7) Your delicious
Veg Kathi Roll is ready. Serve hot. As shown in the picture.


If you have any queries regarding this recipe don't forget to share your comment, your comments are valuable for me. It would always be a pleasure for me to serve you....And I'll be back soon with an another exciting recipe....

Friday, April 17, 2020

Soya Chunks Biryani....Special Recipe

Soy is a good source of protein for vegetarians and vegans or for people who want to reduce the amount of meat they eat. Soy protein products can be good substitutes for animal products because, unlike some other beans, soy offers a 'complete' protein profile. Soy protein products can replace animal-based food which also have complete proteins but tend to contain more fat, especially saturated fat without requiring major adjustments elsewhere in the diet.100 grams of raw soybeans supply 446 calories and are 9% water, 30% carbohydrates, 20% total fat and 36% protein. Source taken from https://en.wikipedia.org/wiki/Soybean 


Soya Chunks are known for its various health benefits. It's good source of Omega-3 Fatty Acid and Fiber, it can benefit in lowering down Cholesterol levels in a body. It enhances Bone health and Digestibility. It's also a good source of Vitamin B, Vitamin K, Riboflavin and Folate (Vitamin B 9). It's a good source of Minerals namely Manganese, Iron, Calcium and Magnesium. Due to good Fiber content, it helps you keep a close check on your body weight and fight Diabetes. Its high content of Magnesium has shown results in fighting Insomnia. In some people, Soy products may suppress Thyroid function, cause Flatulence and Diarrhea, and lead to allergic reactions.

Soya Chunks Biryani is one of the easiest, delicious and flavorful Biryani. The main ingredients of
Soya Chunks Biryani are Soya Chunks, Basmati Rice, Curd and Spices. Hope you will give this a try and let me know how it turns out for you.


Prep Time: 30 mins
Cook Time: 1 hr

Total Time: 1 hr and 30 mins
Servings: 3-4

Course: Lunch and Dinner

Cuisine: Indian

Author: Ayesha Md


Ingredients:

For Soya Chunks and Layering:

100-150 gm Soya Chunks
2 tbsp ginger and garlic paste
150 ml beaten yogurt
1 tbsp red chilli powder or (as per taste)
1 tsp kashmirilal mirch powder
2 medium size onions, thinly sliced
salt as per taste
2 bay leaves
2 small cinnamon sticks
3 cloves
4-6 black peppercorns
1 black cardamom
2 green cardamoms
1 tsp cumin seeds
100 ml oil
a cup of fresh mint leaves
2-4 green chillies whole (remove the stems)
1 star anise
3-4 tbsp Shan/Al-Aziz/Rehmat Biryani Masala
1 tbsp Kewra water to sprinkle
a pinch of saffron color mix with 2 tbsp of milk
2 tbsp of ghee
some dry fruits (as per your choice)
50-75 ml of water (1/2 cup)
2 medium size tomatoes, chopped


For Boiling rice:

500 gm Basmati (White or brown) rice
Water required for boiling the rice
salt as per taste
2 bay leaves
2 small cinnamon sticks
2 cloves
2 green cardamoms
1 black cardamom
4-6 black peppercorns
1 star anise


Instructions:

1) Wash and soak basmati (white or brown) rice for 1 hr at least.

2) Take an empty vessel, boil water with some salt and add the Soya Chunks. Cook on medium flame for 15 minutes. Turn off the flame. Drain the excess water, and rinse with cold water and squeeze it till dry. Keep aside.


3) Heat oil into a pot vessel, then add bay leaves, cinnamon sticks, green cardamoms, black peppercorns, star anise, black cardamom and cumin seeds cook till they crackle.

4) Add onion and saute till they turn golden brown, add tomato and some salt, saute for another 5 minutes, then add ginger and garlic paste, red chili powder, kashmirilal mirch powder, Shan/Al-Aziz/Rehmat Biryani Masala, beaten yogurt. Fry for 2 more minutes and add the previously cooked Soya Chunks, add water, if required and cook for 5-10 minutes or until the oil separates.

5) Take an empty vessel, add water as required for boiling the rice, add salt, bay leaves, cinnamon sticks, cloves, green cardamoms, black peppercorns, star anise and black cardamom, bring it to a boil.

6) Add soaked rice into the boiling water and cook further for 10-15 minutes or till rice is cooked about 85%-90%. Now, drain the excess water and set aside. As shown in the picture.


7) Take an empty vessel, now place 1/3 of rice to it and spread it evenly, then add 1/2 of Soya Chunks gravy, 2 green chillies and some mint leaves. Repeat this process for the rest of the Soya Chunk gravy, rice, green chillies and mint leaves.

8) Add food color at the top of the layer. And sprinkle some kewra water. Cover the lid of the vessel and cook the Biryani for 10-15 minutes on very low flame.

9) Take a pan, heat ghee and add peanuts and fry till it turns golden brown. Pour it into the cooked Biryani.

10) Yours Soya Chunks Biryani is ready to serve. Serve hot with Rita or Chutney. As shown in the picture.


If you have any queries regarding this recipe don't forget to share your comment, your comments are valuable for me. It would always be a pleasure for me to serve you....And I'll be back soon with an another exciting recipe...

Angoori Rasmalai

Rasmalai   is an Indian popular sweet dish.  Rasmalai  got its name from the two words, these are  Ras  means sweetened  milk syrup   and  M...